
Last Updated on April 29, 2023 by pm_author_91ksj
If you’re interested in taking some high-quality pictures in a dark room, there are a few things to consider before diving in. Preparing for a dark photo session can be tricky, but with the right strategy, you can ensure you take the best possible photos.
From choosing the right lighting setup to selecting the right props, here are some tips to help you prepare for your dark photo session:
Tip – Description
Choose the right lighting setup – Select a lighting setup that will produce the desired effects and ensure you have enough light to capture your desired shots.
Select the right props – Choose props to help create the atmosphere you are trying to achieve in the photo.
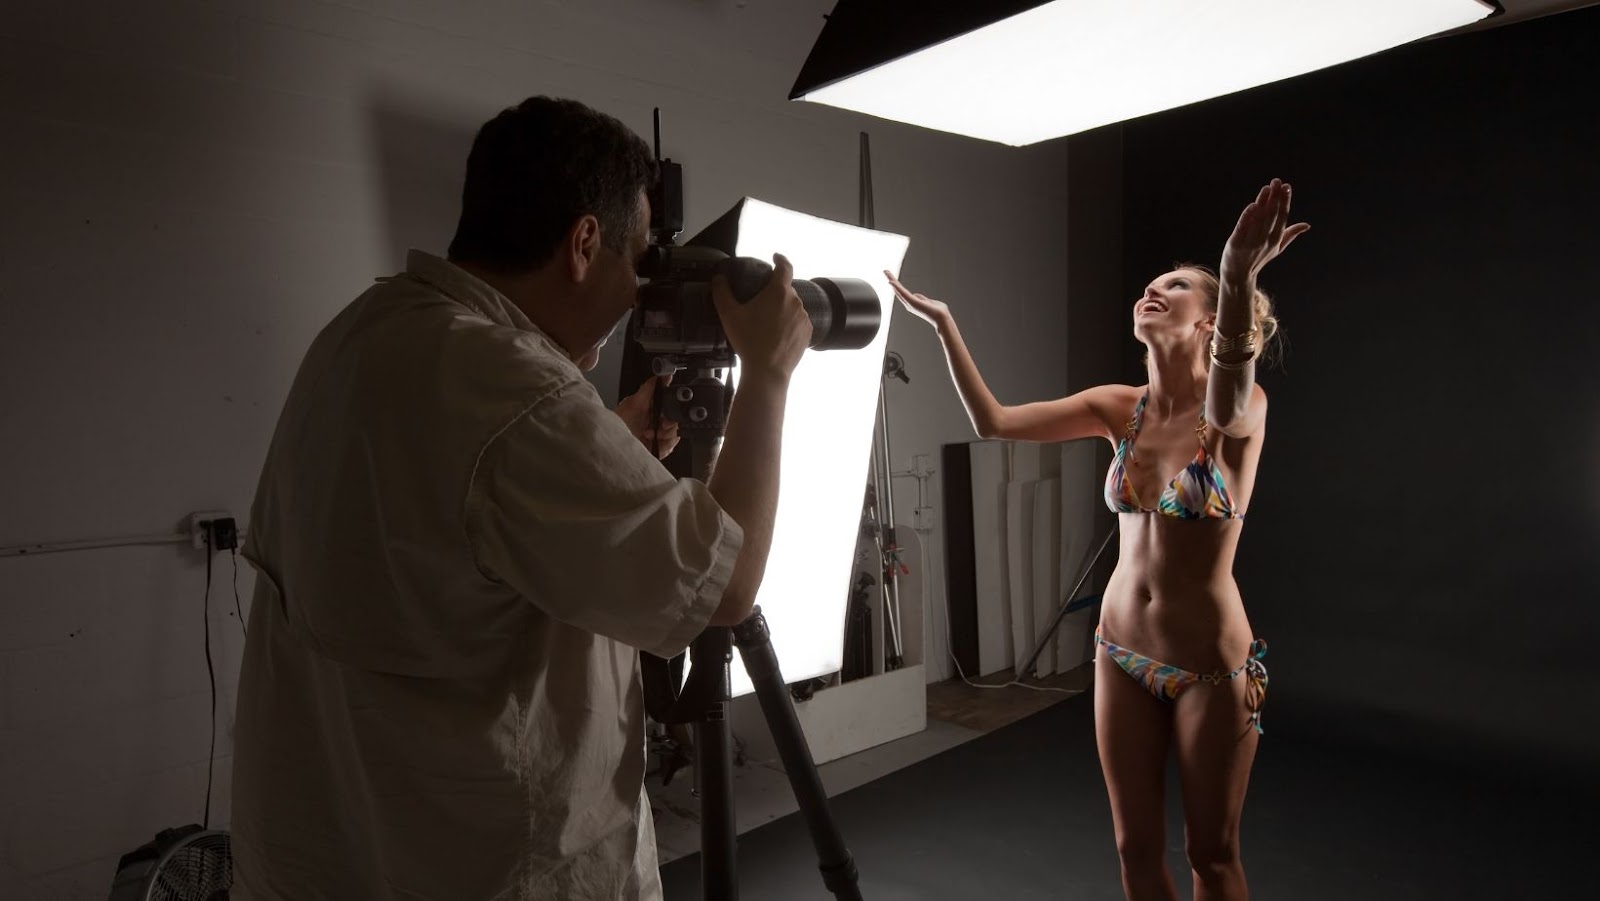
Tips For Preparing For A Dark Photo Session
Understanding the setting is crucial to preparing for a dark photo session, as it can greatly impact your ability to capture high-quality images. Here are some tips to help you prepare for your next dark photo session:
Familiarize yourself with the location:
Before the photo session, visit the location and note the lighting conditions, available light sources, and potential obstacles.
Use a tripod:
A tripod will help stabilize your camera and prevent blurry images.
Bring additional lighting:
Consider bringing extra lighting equipment, such as a flashlight or a spotlight, to help you create the desired lighting effects.
Adjust your camera settings:
Adjust your ISO, aperture, and shutter speed to optimize your camera for low-light environments.
Practice:
Practice taking photos in low-light environments to hone your skills and gain confidence in your abilities.
Following these tips and understanding the setting can elevate your dark photo session and capture stunning images.
Using the right gear and equipment
When preparing for a dark photo session, using the right gear and equipment is crucial to taking great photos in low light conditions.
Here are some essential tools to have in your kit:
1. A camera with manual settings:
A camera that allows manual control over ISO, shutter speed, and aperture is essential for low light photography.
2. A fast lens:
A lens with a wide aperture (low f-stop) like f/1.8 or f/1.4 will allow more light into the camera, making it easier to take photos in the dark.
3. A sturdy tripod:
A tripod will keep your camera stable during long exposures and prevent camera shake.
4. Remote shutter release or self-timer:
To avoid camera shake when taking photos, a remote shutter release or self-timer will help ensure sharp images.
5. Extra batteries and memory cards:
Low light photography can drain your camera battery, so it’s important to have extra batteries and memory cards to keep shooting.
You can capture stunning photos in the dark with the right gear and equipment.
Setting the mood and tone
Setting the mood and tone is crucial to a dark photo session. Here are some tips for preparing for a successful photo shoot in low light conditions.
1. Choose the right location:
Find a location that complements and enhances the mood you want to create in the photos. For example, a dark, isolated place can add a sense of mystery and whispering, while a well-lit area can add drama and atmosphere.
2. Use lighting to your advantage:
Lighting is essential in a dark photo session. Experiment with different types of lighting, such as natural light, flash, or artificial lighting, to find the best one for your shoot.
3. Communicate with your models:
Build a comfortable and trusting relationship with the models, and communicate clearly about the mood and tone you want to set for the shoot. This will help them feel comfortable and confident in front of the camera.
4. Experiment with shadows and silhouettes:
Shadows and silhouettes can add depth and drama to your photos. Experiment with positioning your models in front of different light sources to create interesting shadow patterns and silhouettes.
5. Edit your photos:
Post-processing your photos can help enhance and set the mood and tone you want to convey in your images.
Pro tip: Remember that a dark photo session is about taking photos in low light conditions and creating a mood and tone that complements the shoot’s theme. So, prepare well and experiment with lighting, shadows, and silhouettes to create stunning and evocative images.
【19才の真実】夜景の見える一室で密かに行われているという闇の撮影会を限定公開しちゃいますww
Lighting is essential when taking dark photos, as it can make or break the image. There are a few tips and tricks that you can use to get the best out of your dark photo session.
In this article, we will look at some of the most common lighting techniques used in dark photo sessions and some tips for taking great photographs.
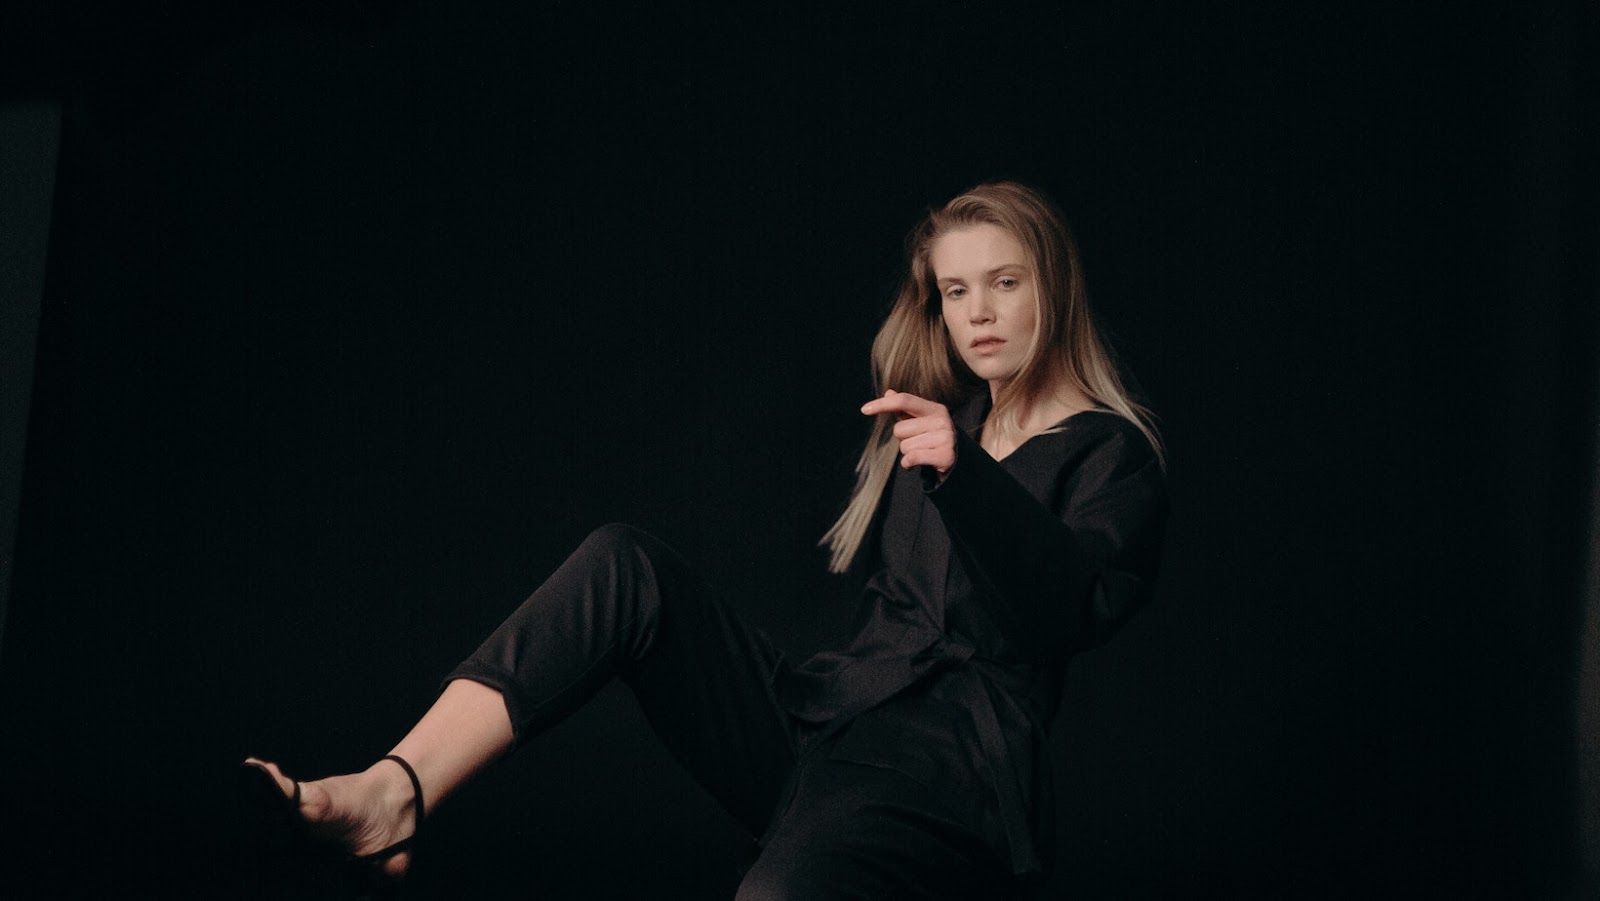
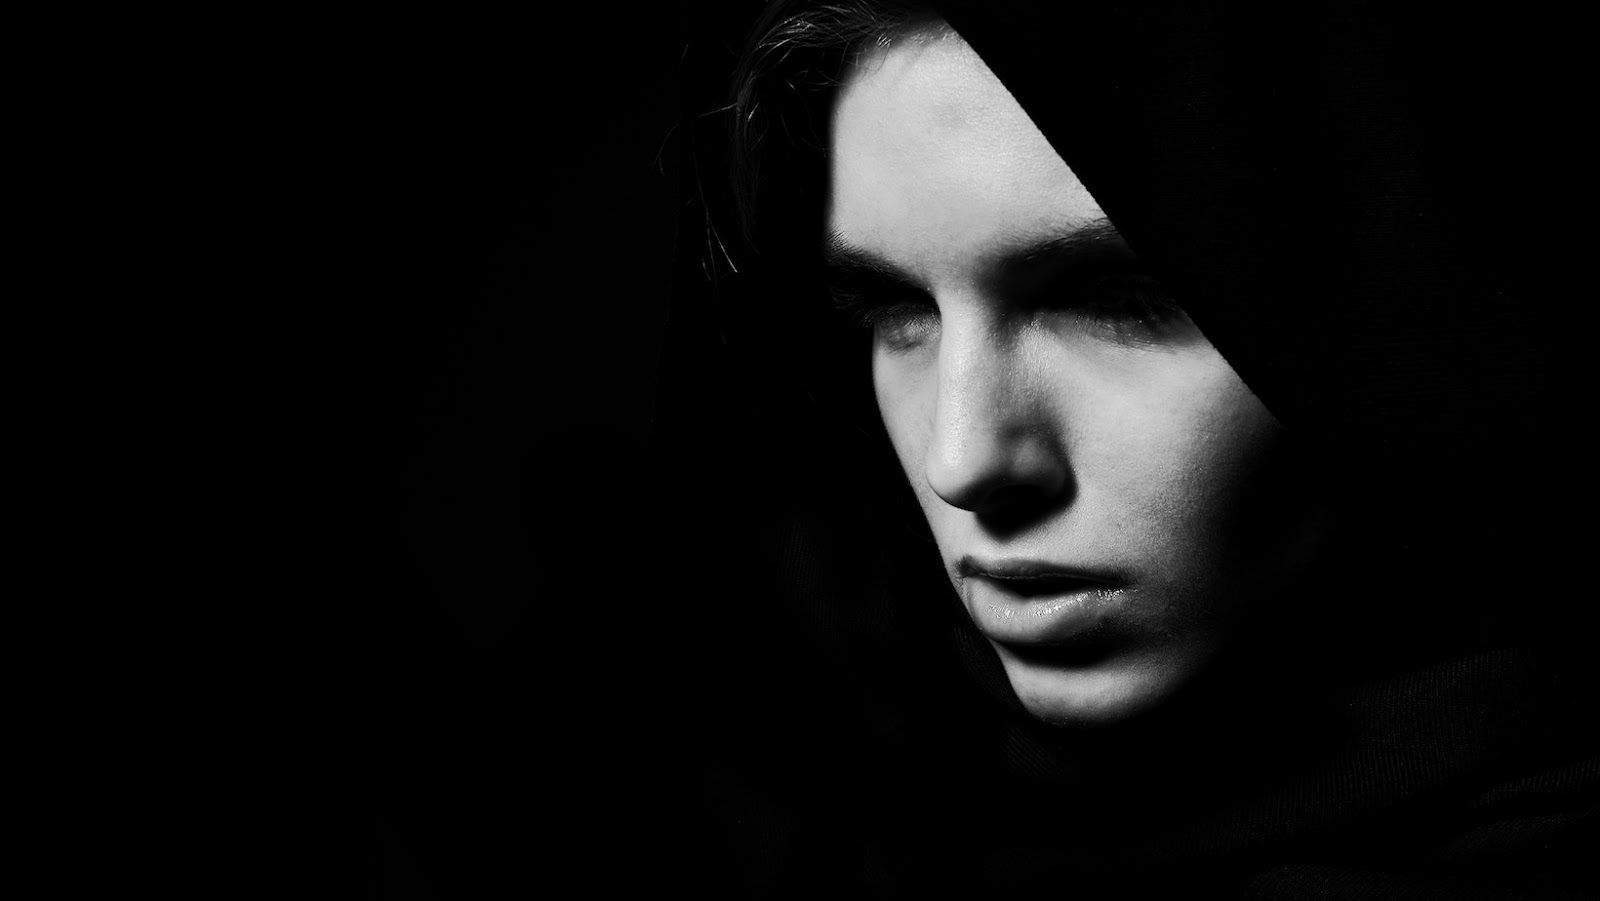
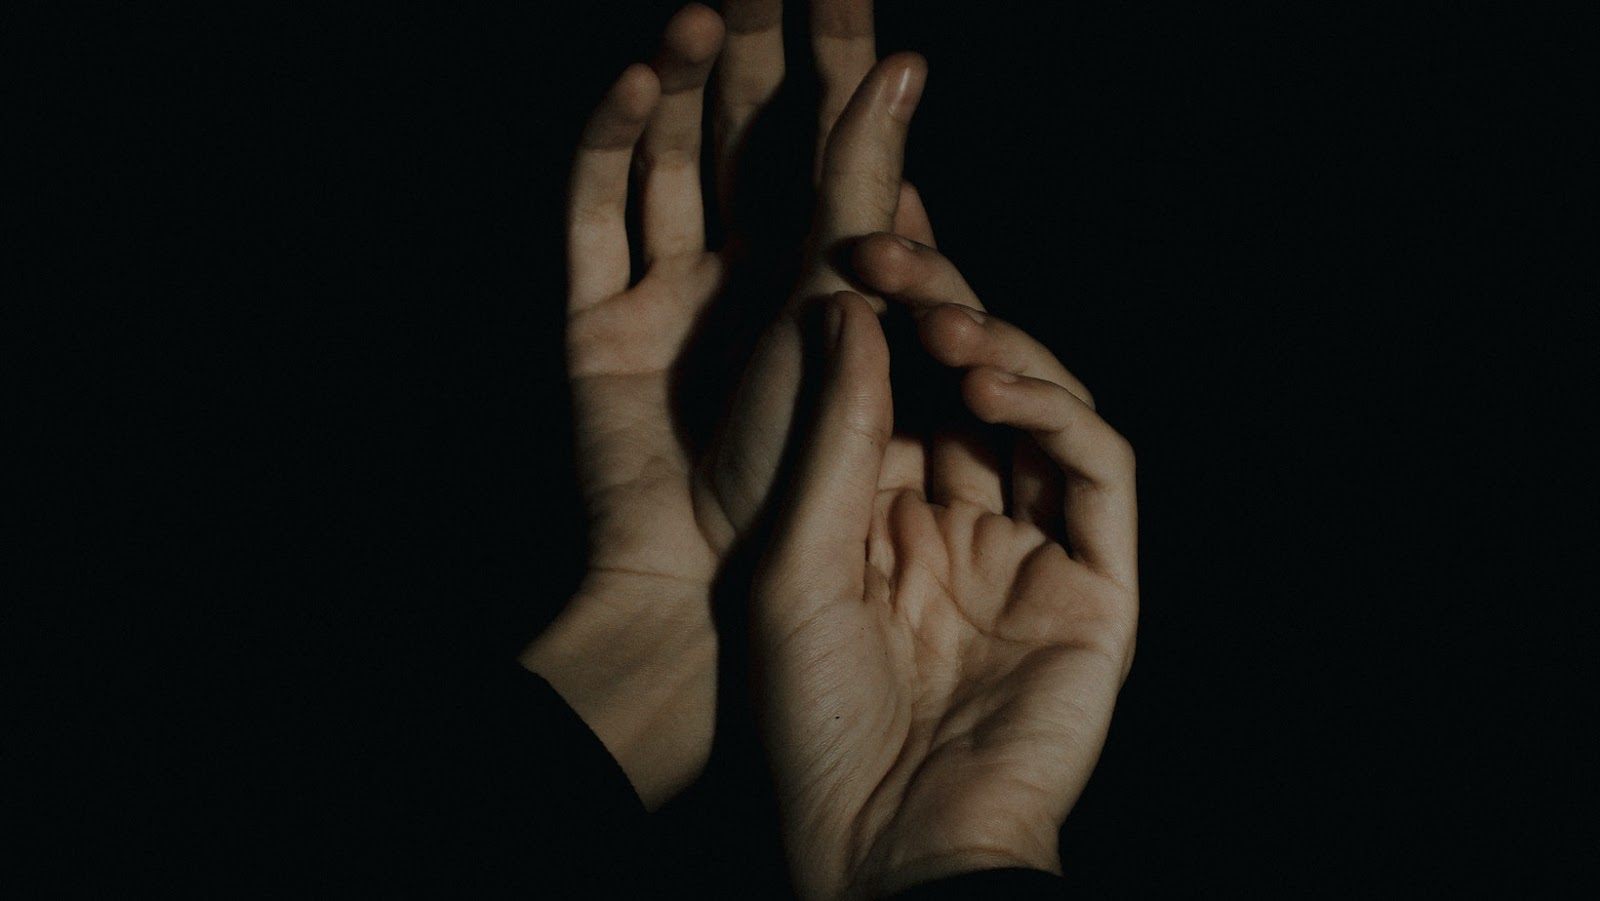
Creative use of light and shadow
Creative use of light and shadow is a powerful technique that can transform a dull and flat scene into something dramatic and visually striking, especially for a dark photo session.
Here are some lighting techniques for a dark photo session that can help you create captivating photos:
Low key lighting:
This technique uses minimal light to create a dark and moody atmosphere, with strong contrasts between light and shadow.
Backlighting:
This technique involves positioning your light source behind your subject, creating a halo or rim of light around them.
Silhouetting:
This technique involves placing your subject before a bright light source, creating a striking and dramatic silhouette against the background.
Rembrandt lighting:
This technique involves placing the light source above and to the side of your subject, creating a classic triangular pattern of light and shadow on their face.
Experiment with these techniques and be open to using different light sources such as candles, streetlights or fairy lights to create a unique and memorable visual storytelling.
Managing exposure settings for the perfect shot
Managing exposure settings is crucial for capturing the perfect shot, especially when dealing with dark photo sessions or night-time photography.
Here are some techniques to keep in mind when adjusting exposure settings:
Increase ISO
A higher ISO setting lets your camera capture more light, making it a useful tool in low-light settings.
Adjust Shutter Speed
A slower shutter speed lets more light into your camera’s sensor, which can help you capture better photos in low-light situations.
Open up the Aperture
A wide aperture lets more light into your lens, allowing brighter photos in darker settings.
These techniques are particularly useful for capturing great photos during a dark photo session. Pro Tip: To minimize camera shake, consider using a tripod or stabilizer when adjusting these settings.
Posing And Composition Tips For Dark Photo Session
Taking a great photo at a dark photo session can be a challenge. The lack of natural light is the biggest issue for many photographers. But keeping the right composition and styling in mind, you can create beautiful photos.
This article will discuss how to get the most out of your dark photo session. We’ll provide tips on posing, lighting, and composing your images in this low-light environment.
Planning the poses in advance
Planning the poses is essential for a dark photo session to ensure your photos’ perfect composition and outcome.
Here are a few tips to keep in mind to get the best shots during your dark photo session:
1. Scout the location beforehand and identify areas with good lighting.
2. List poses you want to capture during the session.
3. Familiarize yourself with the equipment and lighting techniques.
4. Communicate with your subject to ensure they’re comfortable with the poses and lighting.
5. Take test shots before the session to ensure perfect composition.
Planning your poses in advance will make you feel more confident and prepared during your dark photo session. This will result in a better overall outcome of your photos.
Experimenting with different angles and perspectives
In photography, experimenting with different angles and perspectives can help you create unique and captivating compositions, especially during dark photo sessions.
Here are some posing and composition tips for taking great photos during a dark photo session:
1. Incorporate shadows:
Use shadows to create depth and a sense of mystery in your photos. Position your subject in areas where the light falls at an angle, creating interesting patterns with the shadows.
2. Play with framing:
Use natural elements, such as doorways or windows, to frame your subject and draw the viewer’s eye to the focal point of your photo.
3. Use leading lines:
Incorporate diagonal or straight lines into your photos to create a visual journey for the viewer’s eye. This can be anything from a staircase to a fence or building.
4. Explore different angles:
Don’t be afraid to get low or high to capture a unique perspective. Shooting from a different angle can completely change the feel of your photo.
Experimenting with these techniques can help you take your dark photo sessions to the next level and produce stunning and captivating photos.
Editing Strategies For Dark Photos
The dark photo session is an interesting concept that often leads to captivating results. However, it could also be an intimidating endeavor for anyone with limited photo editing software knowledge.
In this article, we will discuss the different strategies of editing dark photos, and how to use them to your advantage. You can create some truly stunning and captivating photos with the right editing techniques. So let’s get started!
Enhancing the mood through editing
Enhancing the mood through editing is a powerful way of transforming dark photos into striking, evocative images. Here are some editing strategies for dark photos that can help you elevate your photography game:
Adjust the exposure:
Dark photos often lack detail and clarity. However, adjusting the exposure can brighten the image and reveal hidden details.
Increase contrast:
Increasing contrast can make the photo look more dynamic and dramatic. In addition, it can help bring out shadows and highlights in the photo, adding depth and dimension to the image.
Play with colors:
Dark photos can benefit from color adjustments. For example, you can change the color temperature to make the photo look warmer or cooler or selectively adjust the colors to create a mood that fits your vision.
Use vignettes:
Vignettes can help focus the viewer’s attention on the subject and add a dramatic effect to the image. You can create a vignette by darkening the edges of the photo.
Pro tip: Always remember that editing is a tool for enhancing the mood, not fixing the mistakes. Don’t overdo it, or the image may look artificial and unappealing.
Adjusting the lighting and exposure
When dealing with dark photos, adjusting the lighting and exposure is crucial to the editing process to bring out the best in your images. Here are some tips to help you adjust the lighting and exposure of dark photos:
Setting – Action
Brightness
Increase the brightness of your image slightly to enhance the details of your subject.
Shadows
Boost the shadows of your image to illuminate and bring out the details that may have been lost due to lighting conditions.
Contrast
Adjust the contrast of your image to provide a clear distinction between the highlights and shadows within your photo.
Exposure
Increase the exposure of your image to add brightness to the overall picture.
White balance
Adjust the white balance to ensure color accuracy and correct any color imbalance in your dark photos.
Adjusting these settings can make your images shine and enhance their overall appearance. Of course, taking well-lit images is always better, but with these tips, you can save, improve, and transform the quality of your dark photos.
Using color grading to create a unique look
Color grading is a powerful photo and video editing technique that allows you to create a unique and customized look for your images. By manipulating the colors and tonality, you can transform an ordinary photo into a work of art that captures the desired mood and atmosphere.
One effective strategy for dark photos is to use a cool color grading scheme emphasizing blue, teal, and purple hues. This creates a moody and atmospheric feel that enhances the drama and emotion of the image.
To achieve this look:
- Start by adjusting the white balance and exposure to ensure accurate tones.
- Apply a primary color grading layer that emphasizes the cool hues.
- Add a secondary color grading layer that adjusts the overall tonality and contrast to create depth and dimension.
Pro tip: Experiment with different color grading schemes to find the one that best captures the mood and style of your images.
Common Mistakes To Avoid During A Dark Photo Session
If you want to take great photos during a dark photo session, there are some common mistakes you’ll want to be aware of and avoid. Things such as not having enough lighting, not having the right camera settings or forgetting to bring the right equipment can all hurt the quality of the photos you shoot.
Let’s explore the common mistakes you should watch out for when taking dark photos.
Overexposing or underexposing the shots
Overexposing or underexposing the shots is a common mistake people tend to make during a dark photo session. When underexposed, the photo will appear too dark with no visible details, and when overexposed, the photo will be too bright, resulting in a loss of details, making the photo appear washed out.
Here are some tips for taking great photos during a dark photo session:
Use a tripod to keep the camera stable and avoid blurry photos.
Increase the ISO setting on your camera to increase the camera’s sensitivity to light.
Use a slow shutter speed to allow more light into the camera and create a brighter photo.
Adjust the aperture to control the amount of light entering the camera.
Experiment with different angles and perspectives to create visually appealing shots.
Poor planning of poses and composition
Poor planning of poses and composition can lead to disappointing results during a dark photo session. Here are some mistakes to avoid:
1. Not considering the lighting:
Lighting is crucial in setting the mood and highlighting the subject in a dark photo session. Not paying enough attention to lighting can ruin the shot.
2. Overusing props:
Props can add interest and depth to a photo. However, overusing them can make the picture cluttered and distract from the main subject.
3. Ignoring the background:
The background is just as important as the subject. It can complement or clash with the subject, making or breaking the photo.
4. Forgetting about posing:
Even in a candid shot, posing is essential. A well-thought-out pose can make the subject look relaxed and natural, while a poorly executed pose can make them look stiff and unnatural.
Pro tip: Plan and experiment with different poses, lighting, and props before the photo session. This will ensure that you get the best results possible.
Failing to utilize the available light sources.
Failing to utilize the available light sources is a common mistake to avoid during a dark photo session. This can result in blurry or grainy photos, and a lack of details or depth.
Here are some tips to help you utilize available light sources during a dark photo session:
Use the ambient light in the room to your advantage. Look for lamps, candles, or other light sources that can be used to illuminate your subject.
Increase your camera’s ISO setting to make it more sensitive to the available light.
Use a tripod to stabilize your camera and prevent motion blur.
Consider using a slower shutter speed to capture more light, but ensure your camera is set up on a stable surface.
Avoid using flash unless necessary, as it can wash out your subject or create unwanted shadows.
Paying attention to available light sources and adjusting your camera settings accordingly allows you to capture beautiful and detailed photos even in low light situations.

